前言
硬件开发板:
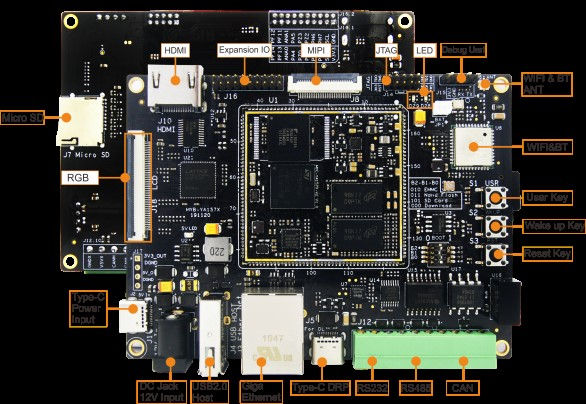
米尔科技 MYD-YA157C

软件链接:
源码及工具 http://down.myir-tech.com/MYD-YA157C/
参考 MYD-YA157C-V2 Linux 系统开发指南 V2.0
更新时间 2020-10-10
本文着重讲述单独编译内核及更新内核部分。
获取 kernel 源代码
下载 http://down.myir-tech.com/MYD-YA157C/04_Sources.zip
拷贝解压 04-Source/MYiR-STM32-kernel.tar.bz2 到指定自定义的 work 目录(如/home/work);
解压进入源码目录并查看对应的文件信息,如拷贝到 work 目录。
1
2
3
| PC$ cd /home/work
PC$ tar -jxvf MYiR-STM32-kernel.tar.bz2
PC$ cd MYiR-STM32-kernel
|
目录包含:
源代码目录:stm32mp15xc-kernel
指导说明:README. HOW_TO.txt
编译过程使用命令在README. HOW_TO.txt中都可以查看。
配置内核
进入内核目录
1
| PC$ cd stm32mp15xc-kernel
|
创建输出文件夹 build
内核配置
1
| PC$ make ARCH=arm O="$PWD/../build" myc-ya157c_defconfig
|
如需配置内核或者想打开内核某一个驱动功能也可使用如下方式。
1
2
| PC$ cd build
PC$ make menuconfig
|
编译内核
加载 SDK 环境变量
1
2
| PC$ source /opt/st/myir/3.1-snapshot/environment-setup-cortexa7t2hf-neon-vfp
v4-ostl-linux-gnueabi
|
内核配置
1
| PC$ make ARCH=arm O="$PWD/../build" myc-ya157c_defconfig
|
编译内核
1
2
| PC$ make ARCH=arm uImage vmlinux dtbs LOADADDR=0xC2000040 O="$PWD/.. /build"
PC$ make ARCH=arm modules O="$PWD/../build"
|
耐心等待编译完成。
生成输出文件
1
2
3
4
| PC$ make ARCH=arm INSTALL_MOD_PATH="$PWD/../build/install_artifact" modules_install O="$PWD/../build"
PC$ mkdir -p $PWD/../build/install_artifact/boot/
PC$ cp $PWD/../build/arch/arm/boot/uImage $PWD/../build/install_artifact/boot/
PC$ cp $PWD/../build/arch/arm/boot/dts/st*.dtb $PWD/../build/install_artifact/boot/
|
build/install_artifact 看到编译输出文件;
build/install_artifact/lib 目录存放的是内核模块文件;
build/install_artifact/boot 目录存放的是设备树与内核镜像文件。
修改设备树
用户可以在 BSP 源码里创建自己的设备树,一般情况下不需要修改 Bootloader 部分中的 TF-a 和 u-boot。
用户只需要根据实际的硬件资源对 Linux 内核设备树进行适当的调整即可。
| MYD-YA157C-V2 设备树列表 |
| 项目 | 设备树 | 说明 |
|---|
| Tf-a | stm32mp15xx-ya157c.dtsi | 资源设备树 |
| stm32mp157c-ya157c-512d-v2.dts | 支持 V2 核心板设备描述 |
| stm32mp15-ddr3-2x2Gb-1066-binG.dtsi | 双片 256MB DDR3 描述 |
| U-boot | stm32mp15xx-ya157c.dtsi | 资源设备树 |
stm32mp157c-ya157c-512d-v2.dts
stm32mp157c-ya157c-512d-v2-u-boot.dtsi | 支持 V2 核心板设备描述 |
| stm32mp15-ddr3-2x2Gb-1066-binG.dtsi | 双片 256MB DDR3 描述 |
| stm32mp157-pinctrl.dtsi | stm32mp157 系列处理器的 pin 脚定义 |
| Kernel | myc-ya157c_defconfig | 内核配置文件 |
| stm32mp15xx-ya157c.dtsi | 资源设备树 |
| stm32mp157c-ya157c-v2.dts | 无显示的设备树 |
| stm32mp157c-ya157c-hdmi-v2.dts | 支持 HDMI 显示的设备树 |
| stm32mp157c-ya157c-lcd-v2.dts | 支持 lcd 显示的设备树 |
| stm32mp157-ya157c-pinctrl.dtsi | MYD-YA57C-V2 开发板 pin 脚定义 |
在内核源码下 arch/arm/boot/dts 下可以看到大量的平台设备树。
修改stm32mp15xx-ya157c.dtsi
  1
  2
  3
  4
  5
  6
  7
  8
  9
 10
 11
 12
 13
 14
 15
 16
 17
 18
 19
 20
 21
 22
 23
 24
 25
 26
 27
 28
 29
 30
 31
 32
 33
 34
 35
 36
 37
 38
 39
 40
 41
 42
 43
 44
 45
 46
 47
 48
 49
 50
 51
 52
 53
 54
 55
 56
 57
 58
 59
 60
 61
 62
 63
 64
 65
 66
 67
 68
 69
 70
 71
 72
 73
 74
 75
 76
 77
 78
 79
 80
 81
 82
 83
 84
 85
 86
 87
 88
 89
 90
 91
 92
 93
 94
 95
 96
 97
 98
 99
100
101
102
103
104
105
106
107
108
109
110
111
112
113
114
115
116
117
118
119
120
121
122
123
124
125
126
127
128
129
130
131
132
133
134
135
136
137
138
139
140
141
142
143
144
145
| // SPDX-License-Identifier: (GPL-2.0+ OR BSD-3-Clause)
/*
* Copyright (C) STMicroelectronics 2019 - All Rights Reserved
* Author: Alexandre Torgue <alexandre.torgue@st.com> for STMicroelectronics.
*/
#include "stm32mp157-m4-srm.dtsi"
#include "stm32mp157-m4-srm-pinctrl.dtsi"
#include <dt-bindings/mfd/st,stpmic1.h>
#include <dt-bindings/input/input.h>
/ {
memory@c0000000 {
device_type = "memory";
reg = <0xc0000000 0x20000000>;
};
reserved-memory {
#address-cells = <1>;
#size-cells = <1>;
ranges;
mcuram2: mcuram2@10000000 {
compatible = "shared-dma-pool";
reg = <0x10000000 0x40000>;
no-map;
};
vdev0vring0: vdev0vring0@10040000 {
compatible = "shared-dma-pool";
reg = <0x10040000 0x1000>;
no-map;
};
vdev0vring1: vdev0vring1@10041000 {
compatible = "shared-dma-pool";
reg = <0x10041000 0x1000>;
no-map;
};
vdev0buffer: vdev0buffer@10042000 {
compatible = "shared-dma-pool";
reg = <0x10042000 0x4000>;
no-map;
};
mcuram: mcuram@30000000 {
compatible = "shared-dma-pool";
reg = <0x30000000 0x40000>;
no-map;
};
retram: retram@38000000 {
compatible = "shared-dma-pool";
reg = <0x38000000 0x10000>;
no-map;
};
};
/* 屏蔽有些功能,释放GPIO脚
joystick {
compatible = "gpio-keys";
#size-cells = <0>;
button-0 {
label = "usr_button";
linux,code = <KEY_ENTER>;
interrupt-parent = <&gpioi>;
interrupts = <11 IRQ_TYPE_EDGE_RISING>;
};
};
led {
compatible = "gpio-leds";
blue {
label = "heartbeat";
gpios = <&gpioa 14 GPIO_ACTIVE_HIGH>;
linux,default-trigger = "heartbeat";
default-state = "off";
};
red {
label = "red";
gpios = <&gpioa 13 GPIO_ACTIVE_HIGH>;
linux,default-trigger = "none";
status = "okay";
};
};
*/
wifi_pwrseq: wifi-pwrseq {
compatible = "mmc-pwrseq-simple";
reset-gpios = <&gpiof 3 GPIO_ACTIVE_LOW>;
};
/*
panel_backlight: panel-backlight {
compatible = "gpio-backlight";
gpios = <&gpiob 8 GPIO_ACTIVE_HIGH>;
default-on;
status = "okay";
};
panel_backlight: panel-backlight {
compatible = "pwm-backlight";
pwms = <&pwm4 0 5000000>;
brightness-levels = <0 4 8 16 32 64 128 255>;
default-brightness-level = <6>;
status = "okay";
};
*/
usb_phy_tuning: usb-phy-tuning {
st,hs-dc-level = <2>;
st,fs-rftime-tuning;
st,hs-rftime-reduction;
st,hs-current-trim = <15>;
st,hs-impedance-trim = <1>;
st,squelch-level = <3>;
st,hs-rx-offset = <2>;
st,no-lsfs-sc;
};
vin: vin {
compatible = "regulator-fixed";
regulator-name = "vin";
regulator-min-microvolt = <5000000>;
regulator-max-microvolt = <5000000>;
regulator-always-on;
};
vdd_usb: fixedregulator@3 {
compatible = "regulator-fixed";
regulator-name = "vdd_usb";
regulator-min-microvolt = <3300000>;
regulator-max-microvolt = <3300000>;
startup-delay-us = <70000>;
regulator-boot-on;
regulator-pull-down;
};
vddref: fixedregulator@2 {
compatible = "regulator-fixed";
regulator-name = "vddref";
regulator-min-microvolt = <3300000>;
regulator-max-microvolt = <3300000>;
startup-delay-us = <70000>;
enable-active-high;
};
};
......
|
修改后编译设备树
1
2
| PC$ make ARCH=arm dtbs LOADADDR=0xC2000040 O="$PWD/.. /build"
PC$ cp $PWD/../build/arch/arm/boot/dts/st*.dtb $PWD/../build/install_artifact/boot/
|
网络更新内核
在生成输出文件下 build/install_artifact/ 使用 scp 方式传输需要更新的文件。
挂载 boot 目录
若 stm32mp157c使用 ubuntu 文件系统下,需要先挂载 boot 目录。
 1
 2
 3
 4
 5
 6
 7
 8
 9
10
11
12
13
14
15
16
17
| root@stm32mp1: fdisk -lu
......
Device Start End Sectors Size Type
/dev/mmcblk2p1 34 4129 4096 2M Microsoft basic data
/dev/mmcblk2p2 4130 135201 131072 64M Linux filesystem
/dev/mmcblk2p3 135202 167969 32768 16M Linux filesystem
/dev/mmcblk2p4 167970 6926369 6758400 3.2G Linux filesystem
/dev/mmcblk2p5 6926370 7335969 409600 200M Linux filesystem
root@stm32mp1:~# mount /dev/mmcblk2p2 /boot
root@stm32mp1:~# cd /boot
root@stm32mp1:/boot# ls
boot.scr.uimg splash.bmp uImage
lost+found stm32mp157c-ya157c-hdmi-v2.dtb uInitrd
mmc0_extlinux stm32mp157c-ya157c-lcd-v2.dtb
mmc1_extlinux stm32mp157c-ya157c-v2.dtb
|
更新 uImage 与设备树
1
| PC$ scp -r boot/* root@192.168.31.80:/boot/
|
更新内核 modules
删除编译生成文件 build/install_artifact/lib 下的软连接文件
1
2
| PC$ rm lib/modules/<kernel version>/source lib/modules/<kernel version>/build
PC$ scp -r lib/modules/* root@192.168.31.80:/lib/modules/
|
结束语
STM32MP157C更新内核,也可以直接拷贝至bootfs.ext4分区文件中,方便制作TF卡引导或者TF卡批量刷机。
